Learning how to darn
For the past few months I've been intending to darn something-- a sock, a sweater, something knitted and in need of repair. Reason? I really value my knitted goods and believe that they should last a long, long time. If I'm going to invest hours/days/weeks/months into making an article of clothing then it's only logical that I'll repair that item when needed. Problem? I've had nothing with holes! And in steps the boyfriend with a surprising hole in one of his favorite cardigans. Yes, it's store-bought. No, we're not the throw-away kind of people. This became an opportunity for me to try and learn a skill that has largely been lost on my generation. I don't have any solid knitting reference books (note to self...) and if I searched my old needlework books I might have come up with something. Instead, Google led me to one of my favorite blogs, The Coletterie, and a post about darning. Seriously, check it out right now and my photo sequence below will make more sense. Using a dated leaflet that provided written and drawn instruction I set out to make the repair.
I immediately realized I lacked a darning egg or darning mushroom but a quick look around the apartment for a tennis ball (good idea?) pointed out a forgotten orange that was getting a bit hard. Perfect! I had already picked up some darning thread in a very close color match from Yarn Garden in Portland. I found a nice long needle with an eye large enough for the thread.

I began weaving the needle into every other row of stitching in a vertical line and then swung around at the end of the first column and inserted my needle into the stitches for the second, giving myself just under an inch between my initial stitching and the actual hole (ensuring total coverage).

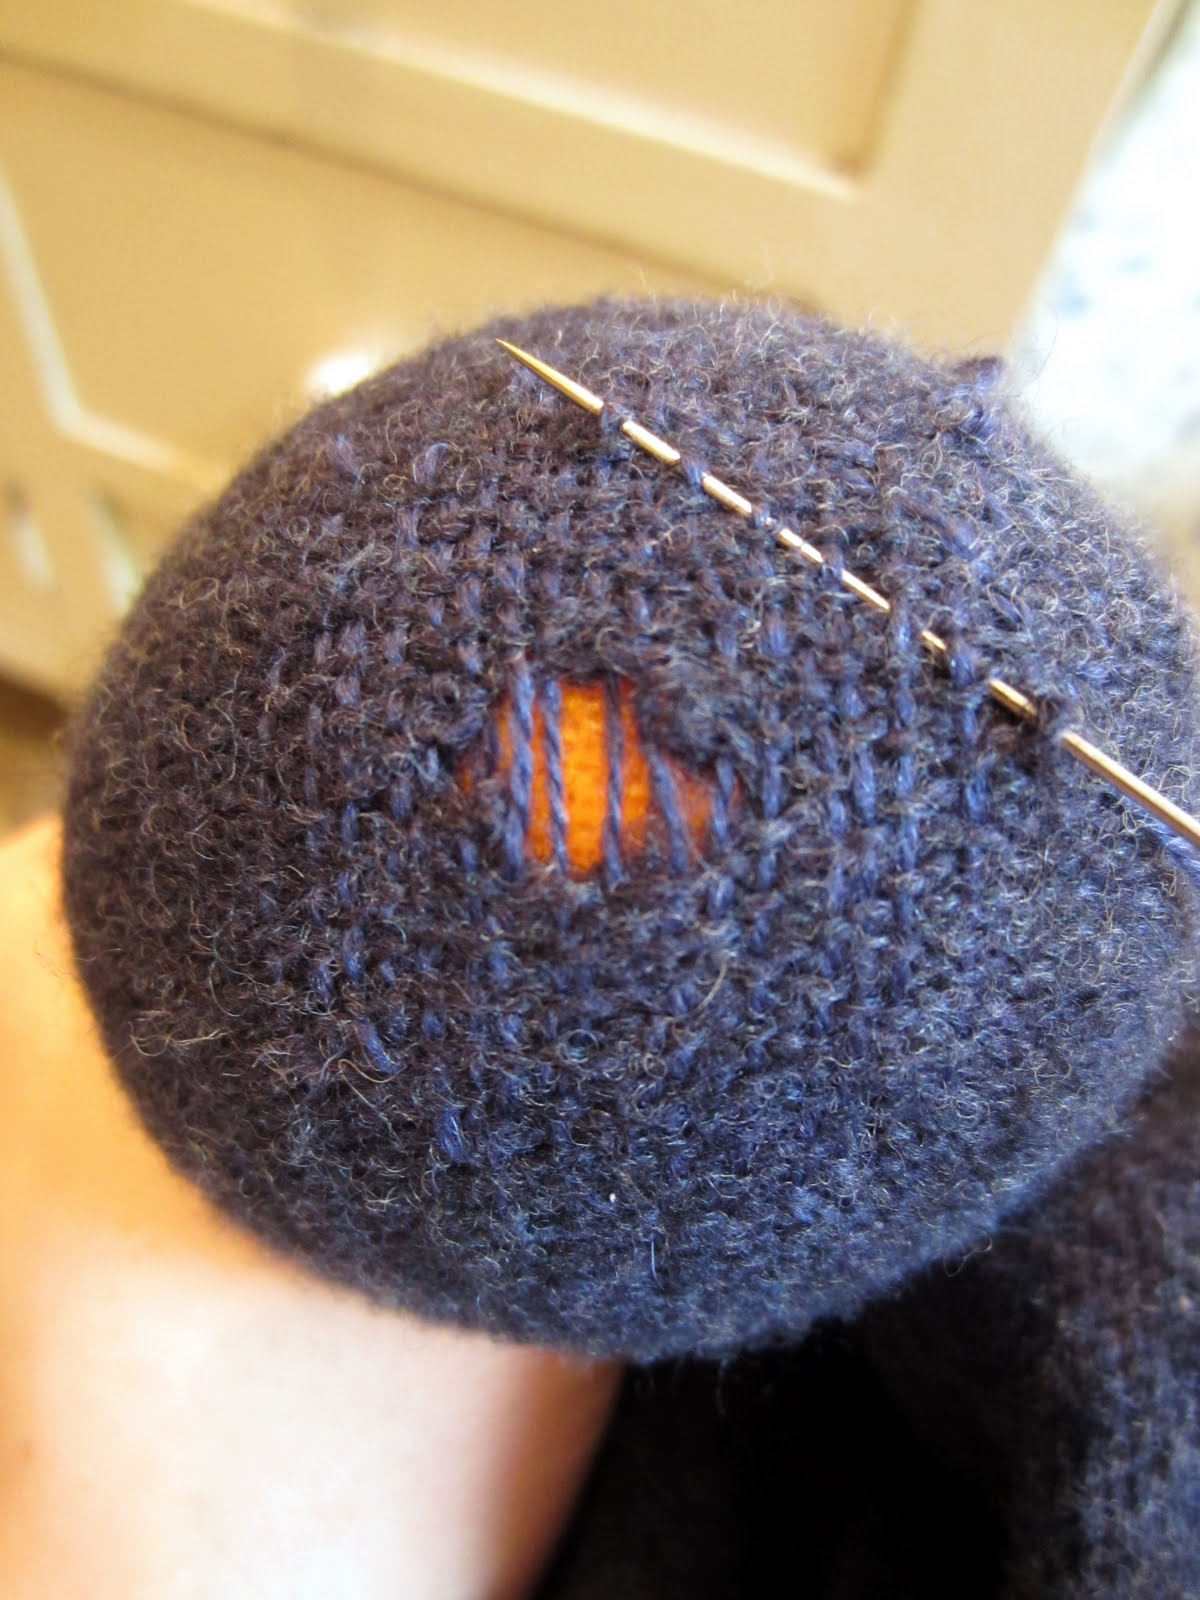
Below you can see that I've put in about 8 columns and reached the hole (but ignore the needle at an angle, that's just where I rested it for the photo). Do the columns extending over the hole seem loose to you? I couldn't be sure what it was supposed to look like and I kept reading that you "stretch" the knitted goods over the darning egg before stitching so I guessed it must be right. (Fast forward, my guess wasn't right. More on that later).

And below is a photo of the finished lines of vertical thread, the first step for darning. In retrospect, it appears that I missed the potential for a couple more lines in the middle of the hole that would have been extremely useful. Next time around I'll be sure to catch the stitches right next to the rows because more thread in the middle gives more structure, and ultimately I want the texture and weight (thickness) of the darning patch to match that of the sweater.

And referring back to the leaflet again for darning on knitted fabrics, I began my diagonal rows of stitching, aiming to catch the columns as best possible. I found this to be really hard because of how close the threads were in color. There was also a slight halo (fuzziness) to the sweater and thread that hid much of the stitch definition.
After getting about halfway through the diagonal rows and reaching the middle of the hole I realized that 1) I didn't have enough vertical lines of thread of the hole; 2) The tension was loose because I had stretched the knitted fabric over the orange to make the stitch definition more apparent, when really I should have kept the fabric much less taught-- not loose, but stretched only a tiny bit past it's normal state. I was worried about getting the lines too tight and pulling on the stitches of the sweater, ultimately leading to extra wear and potential holes in the same spot; and 3) Going back to fix those problems now was an issue.
Much cursing and a phone call later I returned to the work and accepted I'd have to do better. Removing all the stitching was near impossible so instead I tightened up the rows over the hole as best I could, accepting that there would be some loose thread at the ends of columns and rows. I also went back and added two more columns of thread over the hole. I finished the diagonal rows and this is the result:

It's kind of messy. It doesn't imitate the rows of stitching as I had intended. It's far from perfect and that pisses me off. But... after dousing the sweater with a bit of water and drying it so it would regain it's original shape (it was a bit stretched because of the orange) I decided it might do. In fact, it was barely visible from the right side of the sweater. This is a very close view of the hole and repair.

And here's a view of the sweater how it should be. Can you find the spot? Probably not! It's hidden just beneath his right shoulder blade.

In the end he's happy with the result which makes me happy enough to dance. It's not exactly right and it's not the best work I've ever done, and with a bit more practice and additional references on proper darning I think that I'll soon be able to keep my knitted goods in rotation for a long, long time. Just as I wanted.
PS. If you knit a sweater or buy something from the store and intend to repair it down the road, be sure to keep the extra bits of matching yarn from the project or that come attached to the tag of the sweater. If the color had been an exact match then I likely would have been more pleased with the end result.


just this year i started keeping my scraps in my owl cookie jar (which used to be my owl compost jar). i don't think i'll ever remember to put tags on each scrap, but i figure they'll come in handy one day. a friend told me they would be perfect as stuffing!
ReplyDelete